Connecting a sub distribution board
To create a connection between main distribution and sub distribution boards in hagercad.pro you will need to create at least two boards in the project tree and add a board and devices to each one in the materials section.
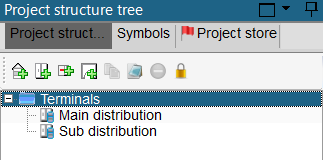
In this guide we will be linking the Main distribution board to the Sub distribution board shown in the image below.
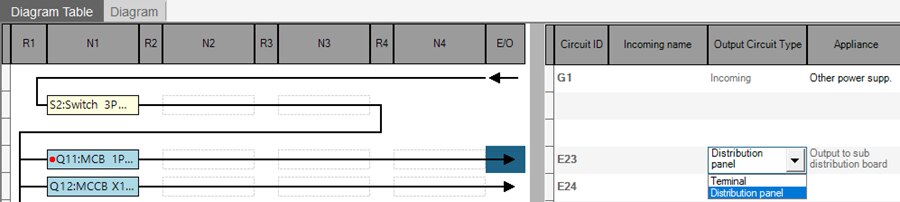
Set your outgoing supply
In the diagram table for the main distribution board, identify which device you want to link to a sub distribution board and change the Output Circuit Type value to Distribution panel.
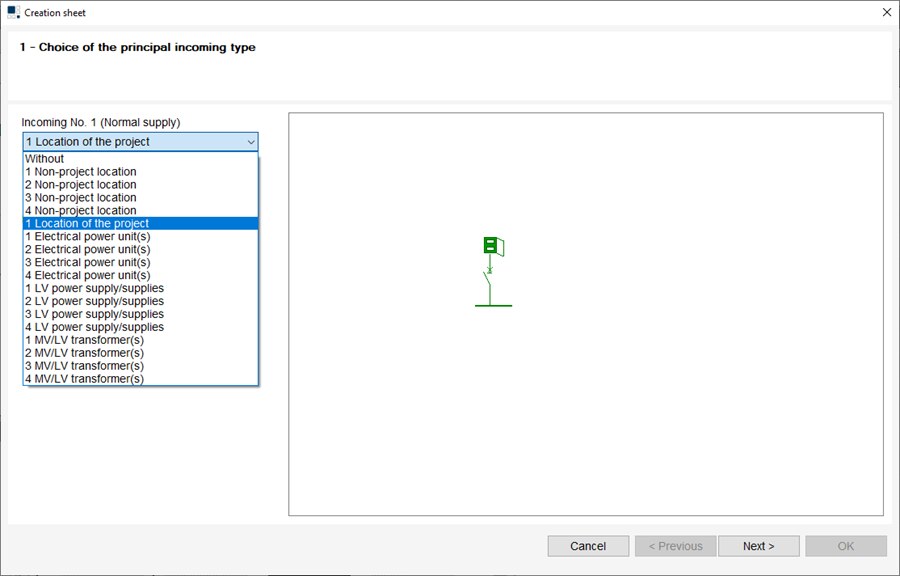
Selecting the incoming supply
In your project tree, select the board you want to use as the sub distribution. This should open the options to select the type of wiring diagrams. Choose the Single line diagram option and wait for the incoming supply window to appear.
Change the ‘Incoming No.1’ supply field to show as a location in the project and then press Next to continue.
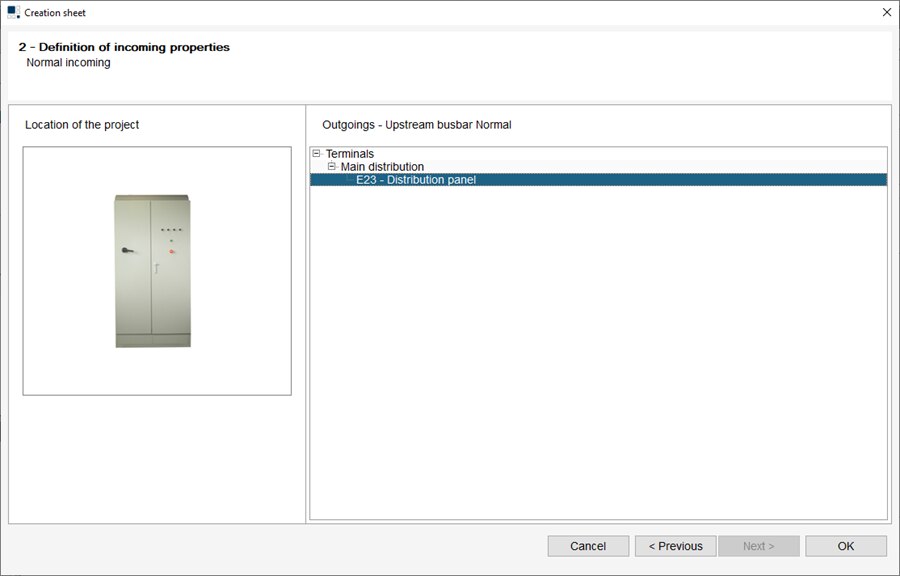
In the next screen you will be able to see the device you nominated to be the outgoing supply. Select the device and press OK to complete the process.
Viewing incoming and outgoing supplies
When you complete the process to connect to a supply within your project, the new sub distribution board will show the following content within the diagram table.

When you switch back to the main distribution board, the device outputting to the sub distribution board will show this information in the diagram table.
